How to change your Default Timezone in Shared hosting web server
By: Rajat Kumar | Last Updated: July 30, 2017
Background:
Hello techies today we are going to discuss about how to set or change Timezone in shared hosting server through .htaccess file, PHP.ini file and in PHP page methods. These all methods may works in different conditions and always effective if you may want to change or set your Timezone if you’re hosting server is not in your country or region.
In this section we are going to discuss some methods of how to change you web server default Timezone if you have shared hosting server, although other we servers like virtual private server (VPS) and dedicated web servers have ability to change Timezone from root server account but in shared hosting this feature is not enabled for user because of many website hosted by one server.
Why Correct Timezone Need?
That is a good discussions by many community that why we need our current country Timezone where from website is currently operating. I have a simple answer about this fact, just imagine that you booked a ticket from any travel booking site and get you ticket confirmation with booking number and correct date & time. At this time you may get different date & time in your ticket than you had chosen at booking time. This situation may make any customer confuse who not really know about that facts.
So as per commercial website purpose the Timezone should be correct as country wise to making business easy and simpler to every customers.
Note: it is not necessary to restart the server when changing the timezone. You will also not have the ability to do so in a shared hosting servers setting, since it will bring everyone's site down.
Set Timezone through .htaccess file (Method-1):
This method is for those who have shared hosting web server and can’t able to change Timezone from root server. This method some time may not work for some web hosting company like: GoDaddy due to not permission to overwrite .htaccess file but some hosting provider company like: inMotion Hosting allow to set custom .htaccess file or may provide .htaccess file for edit. Just follow the simple steps to set your Time zone through .htaccess:
The .htaccess file is a hidden text file within your hosting account that can be very powerful. It is designed so that you can modify it to change the behaviour of your website that normally would take higher access beyond your account. It acts as a liaison between your domain and the server and can perform many functions.
The server has a specific time setting. This is usually based on the servers physical location, for example, if the datacenter that houses the server is located in California, the server will most likely be set to the Pacific Time. Some sites may cater to specific areas of the world and wish to use the timezone for that area. PHP has configuration files that can do this, but what about other tiles such as HTML or Log files? That is where the htaccess comes into play. Below are instructions for changing the base timezone in your local htaccess file.
When using PHP 5.3 or above, you may be required to set the timezone in the php.ini file, which is explained in method-2
Steps to Changing your Default Timezone through .htaccess file:
- Log into your cPanel.
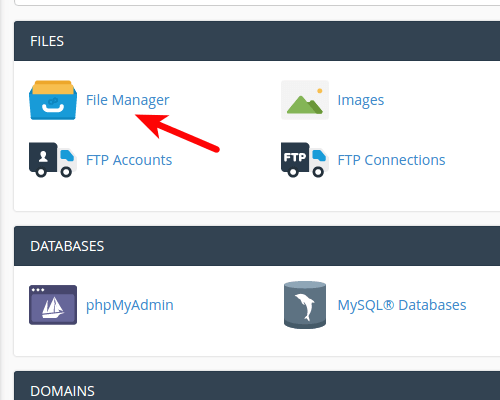
- Find the Files category and click on the File Manager icon.
- Click Settings at the top right corner.
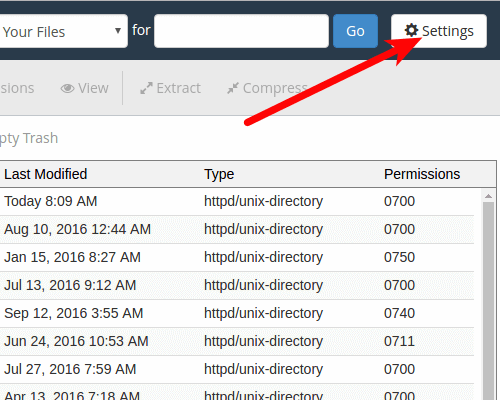
- Select the Document Root for your domain and be sure the checkbox next to Show Hidden Files is checked. Click the Save button.

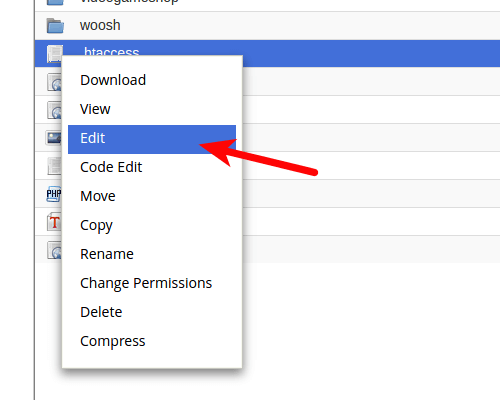
- Look for the .htaccess file and right click on it. This brings up a menu. Find and click on the Edit option.
- Now that you are in the htaccess editor, paste the following code at the top of the page to configure your account. In this example, we are setting the timezone to Eastern Standard Time.
code
SetEnv TZ Asia/Kolkata
- Be sure to hit the Save Changes button in the upper right corner to save your new htaccess configuration.
Set Timezone through php.ini file (Method-2):
If Method-1 is not worked you may have to try this method, to edit php.ini file that set the timezone in php for shared hosting web server. You may find the need to change the server's time zone settings to reflect your timezone. This can be easily accomplished through WHM.
Steps to Set the PHP Timezone:
- Open your php.ini file with the File Manager in cPanel.
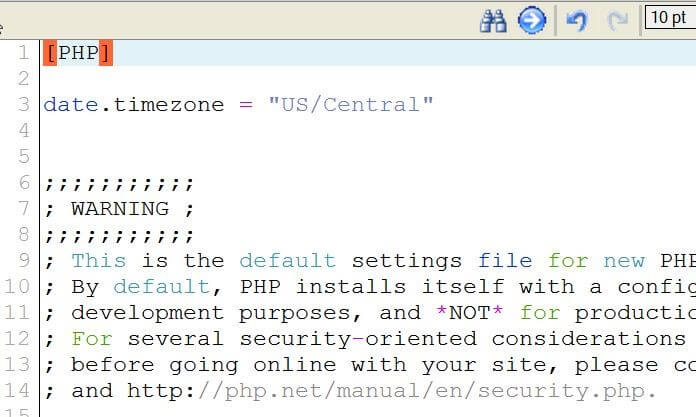
- Add the following line of code to top of your php.ini file
code
- Replace "Asia/Kolkata" with the timezone complete list of PHP TimeZone that corresponds to the time you want to display.
- Once you have entered the desired timezone, click the Save Changes button to save the file.
- Now, you can check your phpinfo.php page to verify the change took place.
Before php.ini file records
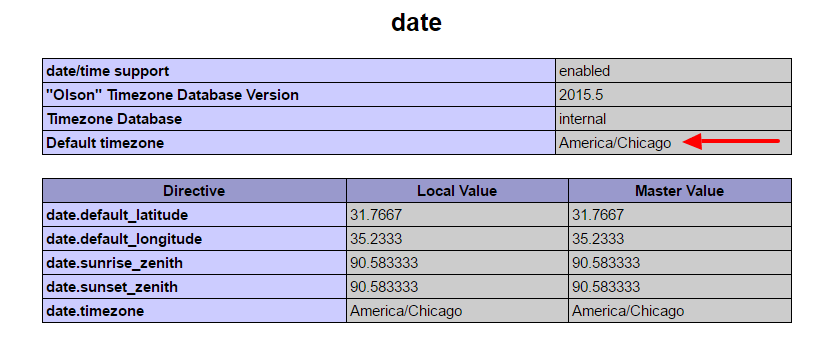
After php.ini file records

Set Timezone through PHP file (Method-3):
This method is final method for who have shared hosting and above all methods not worked at all than you have only way to make our problem resolve. To do so you have to write below code in you header file at top or may create separate file like timezone.php, and include to every php page in where you want to use. This method surely work as per our experience and resolve the timezone problem finally.
In this below code we can set page level timezone by using date_default_timezone_set() function and stored the value in session that’s how we can get current date and time as per set timezone, as like below code where php variable $when contain the current date and time, by using this variable you can store your set date and time.
code
$timezone = "Asia/Kolkata";
$_SESSION['timezone'] = date_default_timezone_set($timezone);
$when = date("d-m-Y h:i:s a");
Conclusion:
All the techniques are tested in production environment so choose one of any technique can resolve you timezone change problem in shared hosting web server. If you have any other best technique please be share with us in comment section, and make the other newbies easy to learn environment.
If you find this article worth to you please hit kudos, comment your view, & share to your friends to make worth to us being writing technical articles. Thanks very much see you in next session.
Difference between serialize() & FormData() methods in jQuery. Top 10 best SEO techniques must use in website Year 2020 (for beginner). Comparing MEAN Stack, MERN Stack, and Full Stack Development: Choosing the Right Technology for Your Project How to change Default Timezone in VPS and Dedicated web hosting servers Creating a Front-End Security Audit Checklist: Examples and Tips Complete list of PHP Supported Timezones for date and time functions. Steps for designing any dynamic website (for beginner).